
For us to print your artwork you need to take a photo or scan your original artwork to create an image file. If you make digital artworks its easier. Once you have the image-file you can upload it and we can print your artwork. However to achieve the best result we strongly recommend you to process your image file in a software such as Photoshop for the best print result.
To achieve a good print result, the print file needs to be in the correct aspect ratio, correct color profile and a good quality. We recommend using Adobe Photoshop (or any other image editing program) and to save your artwork as .PDF if possible.
If you work with paintings an physical artworks it can be difficult to scan or capture the perfect image to use in the digital copy (print file).
We also made a detailed guide on how to create a digital copy of an painting here by scanning or photographing.
This guide is made for Kræss x Purpleposter artists. Sign up and sell your artworks at Kræss x Purpleposter. All you need is a print file of your artwork. We print, promote and sell your artworks as posters online and in our physical store. Sign up here and join 140 other independent artists.
How to create a perfect print file using Adobe Photoshop (recommended)
Most other image software has the same settings – so even though you do not have Photoshop, this guide might still be useful.
Design tips we’ll cover are:
- Setting up your canvas.
- Adding and placing the image-file.
- Consider white margins (border).
- Exporting the print file as PDF.
1. Setting up your canvas
The aspect ratio states the comparison of width to height of the print file (height/width=aspect ratio). Example: A5, A4, A3, A2 and A1 sizes all have an aspect ratio of 1:1.41 where as 40x50 size has an aspect ratio of 1:1.25.
Important: To print an A3-size poster, your print file does NOT need to have the exact same height and width as an A3 poster (42 cm. heigh and 29,7 cm. wide). It just needs to have the same aspect ratio of 1:1.41 (the realation between height and width). The print file could be 84 cm. heigh and 59,4 cm. wide or 7016 px. heigh and 4961 px wide but would still have the same aspect ratio as an A3 poster – which is great! And please do not downsize the files to meet the exact same size as eg. A3 if your original height and width of the file is larger. We would like the best quality possible.

- Open Photoshop
- Go to File > New
- Create a canvas with the same size (and aspect ratio) as the poster size you want to print.
- If possible; your canvas width and height should be the same size (or larger) as you want your poster to be (example: 21 x 29,7 cm. for A4).
- It is not strictly important for the width and height to be exactly the same as the poster size (example: 21 and 29 cm for A4) . However it is very important that the aspect ratio (example: 1:1.41 for A4) is the same (ratio between width and height). Otherwise the poster will be distorted.
- Your print file will be able to work for all poster sizes with the specific aspect ratio (example: A5, A4 A3, A2 and A1 posters all has an aspect ratio of 1:1.41). Remember to set the canvas as large as possible when doing large posters like A1 and A2.
- Choose your orientation (landscape or portrait).
- Set resolution to minimum 300 Pixels/Inch (PPI). We recommend 600 PPI or more.
- Set color mode to “RGB Color (16 bit)”.
- Set Color Profile to “Adobe RGB (1998)”.
- Select Create

If you have been printing your artworks for many years or a familiar with printers you might notice that we do not recommend to edit, proof and export your files in CMYK color mode - as is usually recommended.
This is because our printers are very modern and works with many different inks. This mean it can convert and reproduce the AdobeRGB color space very accurately. And since the AdobeRGB color space is much larger than CMYK, the posters can contain many more colors.

Please use a good monitor to display the colors of your image correctly. If your monitor is not reflecting colors correct, the print might not look the same as on your computer monitor.
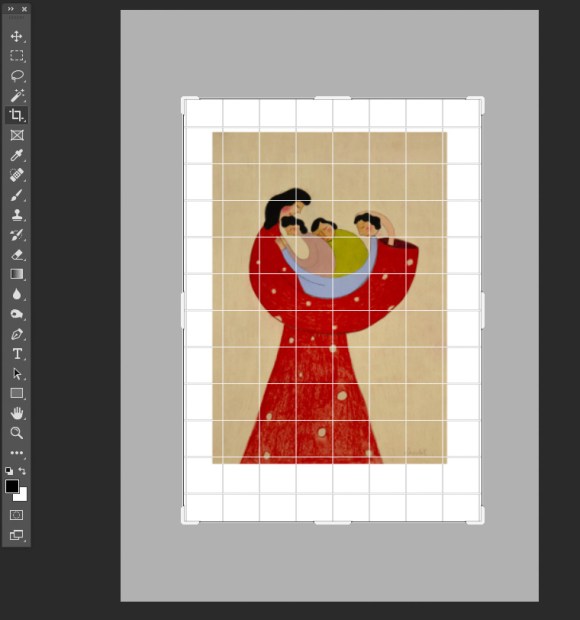
2. Placing the image
Now place the image-file on the canvas.
- Drag the image file onto the canvas or go to File > Place Linked to select an image from your files
- Adjust the size of the image by clicking and dragging the handles on the corners of the image.
- It is not necessary for you to add crop marks (cutting marks), our printer will do it automatically.
If the image-file is smaller than the canvas you should not try to stretch image to fill the canvas! It is better to crop (downsize) the canvas to fit the image-file (even if the canvas size does not meet the same size as the desired posters). Just remember to keep the same aspect ratio!

Once your image file is placed correctly on your canvas you can make color correction changes in Photoshop if you wish. Color correction such as white balance changes in Photoshop may be necessary, as the colors might have changed from the original image file when placing the image into Photoshop (the color profile might be converted).
3. Consider white margins (border)
Consider to put some white space around the print file. Also known as margins. Many artists use white (or colored) spaces around their artwork to make it look more exclusive (just like a passepartout)
Why margins could also be important:
If your customer put your poster in a frame, it also prevents the outermost of the sides (about 0,5 cm.) to be visible as it is covered by the frame. This can be particular annoying if your sign your artworks in the corners and your signature then could be covered by the frame!
If your artwork is made for smaller posters the margin must be larger as larger as the framer would cover relatively more of the psoter.
Suggested margin sizes:
- A5 and A4: 1,5 – 2,5 cm.
- A3: 2 – 3 cm.
- A2 and A1: 2,5 – 3,5 cm.
On larger images it might be a good idea to make the margin bottom wider than the top margin especially if you have a text or signature placed on the bottom margin.


4. Exporting (saving) the print file as PDF
If you have followed all the above steps you are now ready to save the print file.
- Go to menu “File” > “Save a Copy..”
- On the file type selection, choose PDF
- In Save Options, uncheck ‘Layers’ and check “Embed Color Profile: Adobe RGB (1998)”.
- Name your file
- Click Save
- In the General tab: Uncheck “Optimize for web” and “Perserve Photoshop Capabilities”
- In the General tab: No conversion and Include Destination Profile
- In the Compression tab: Do not downsample and keep Image quality at maximum.
- In the Output tab: Choose convert to destination, Adobe RGB and include profile.
- Click Save PDF
Now your image-file is ready to be submitted!
If the finished file size is below 15MB, you might have done something wrong or the image-file is simply not in a sufficient resolution.


This guide is made for Kræss x Purpleposter artists. Sign up and sell your artworks at Kræss x Purpleposter. All you need is a print file of your artwork. We print, promote and sell your artworks as posters online and in our physical store. Sign up here and join 140 other independent artists.